Rustic Onion and Ham Soup with Pancetta Polenta Croutons

The inspiration for this recipe was a leftover ham bone.  The only recipe I could find that used ham bone was split pea soup.  I am not a huge fan of split pea soup, so I decided to start with Julia Child’s pork stock as a guide (if you have her books, look up the split pea soup, the stock recipe is in there).

I wanted something crunchy and a little rich to go with this light soup.  The easy solution is toasted baguette, but I wanted to try something different.  The pancetta polenta crouton I settled on goes well is versatile enough to top salads or stand alone as an appetizer.  For my next dinner party, I plan to serve the polenta croutons topped with fig butter.

Fresh broth is really different to the canned / boxed broth at the supermarket.  I am not against bouillon cubes and boxed stock; those are staples in my pantry.  It’s just nice to experience the difference between store bought and fresh.

If you just don’t have time to make your own broth, just substitute in chicken or vegetable stock.  I haven’t been able to find a place that carries ready-made, gluten-free pork broth.

If you can’t make your stock within a few days and are worried about freshness of the pork bone (who wants Botulism with their soup), wrap the bones well in parchment paper and a Ziploc bag and stick them in the freezer for up to three weeks.

The Stock:

Ham bone

Onion, quartered

2 stalks of celery, chopped into 3 inch lengths

2 carrots, chopped into 3 inch lengths

herb bouquet: 5 sprigs each rosemary, thyme and parsley

1 large bay leaf

10 cups water

Image

1. Tie the rosemary, thyme and parsley together in a thin layer of cheesecloth.  (If you are using a fine strainer at the end, you don’t have to do this, you can toss the herbs into the pot without wrapping them up.)

2. Put the first 6 ingredients in a large stock pot.  Add 8-10 cups water.  The water should completely or mostly cover the ham bone.

3. Bring to a boil.  Stir.  Reduce heat to a medium low and simmer for 2-3 hours, stirring occasionally.

Image4. Remove from heat.  Using a strainer ladle, begin to remove the ham bone, herb bouquet and vegetables.  Strain the broth to catch any smaller bits of bone, etc.  I normally balance a strainer, lined with cheesecloth on top of another large pot and pour from one pot to another.

5. Allow to cool.  Skim fat from top with ladle.

Voila!  Fresh pork broth.

Soup:

4 cups pork, veggie or chicken broth

2 large onions, thinly sliced

3 small carrots, peeled and diced

1 can cannelloni beans, drained

3 cloves of garlic, diced

2 Tbsp. butter

1 Tbsp. brown sugar

red pepper flakes, to taste

salt and pepper, to taste

Pancetta Polenta Croutons:

4 -5 strips of pancetta

1 cup polenta meal

3 cups chicken broth or water

2 Tbsp. Parmesan cheese

2 stems of rosemary, tough stems discarded and finely chopped

Image

1. In a large soup pot, start to sweat the onions and garlic in butter over medium low heat.  After 5 minutes, or when the onions become translucent, add the sugar, chili flakes and a little salt and pepper.  Allow the onions to caramelize, about 20 minutes.  They should be brown and soft.

2. While the onions are caramelizing, crisp up the pancetta. Over a medium high heat in a dry pan, fry up the pancetta.  It should have enough fat that you will not need to add any oil to the pan.  When the pancetta is crispy, remove from heat and finely chop.

4. Start the polenta by bringing the broth to a boil.  Reduce heat to medium low.  Slowly add the polenta meal, stirring constantly.  Allow the polenta to thicken, stirring frequently, about 10 minutes.  When the polenta is thick, add the Parmesan, pancetta and rosemary.  Pour into a 9×9 inch-square pan (I suggest lining the pan with wax paper or saran wrap).  The polenta will firm up as it cools.

5. When the onions are well caramelized, add the carrots and cannelloni beans.  Turn the heat up to medium high.  Cook, stirring occasionally, 3-5 minutes.

6. Add the broth and bring to a boil.  When the soup reaches a rolling boil, reduce the heat to medium low and simmer at least 20 minutes.

7. While the soup is simmering, un-mold the polenta.  Cut into square or rectangles.  I suggest cutting them on the smaller side so you have more crispiness, but then it takes a while to fry off all those squares.

8. Pour grapeseed oil into a medium skillet over high heat.  The oil should come up about ¼ inch or so up the side of the skillet. You can tell the oil is hot enough to fry in when a drop of water sizzles in the oil.  When the oil is hot, starting add polenta, a few squares at a time.  Cook about 2 minutes on a side or until the square is golden brown and crispy.

9. Serve the squares along side the soup, lightly garnished with a little Parmesan.  Garnish the soup with finely minced parsley to add some color.

Enjoy!Image

Gluten-Free Apple Cake with All Spice Glaze: Posted by Popular Demand

After picking too many apples, I was getting tired of the standard crisps and applesauce, so I started exploring some of my old, pre-gluten-free cookbooks looking for alternatives.  For a long time I didn’t have the confidence to write my own baking recipes or convert old favorites into gluten-free alternatives, but there are ratios and patterns that make it easier to start re-inventing old favorites to fit a gluten-free diet.

One of my favorite wedding gifts was a cookbook from my grandmother.  Her copy of Fannie Farmer’s Boston Cooking School Cookbook sits on my kitchen shelves just like it did on hers.  I always found the book intimidating because its recipes don’t lay everything out for you, such as cooking times or pan sizes or indications of when things are done (I think you were just expected to know that).
Fannie Farmer’s book was revolutionary when it was released because it treated cooking like a science and not an art.  She used measuring cups and leveled them off, bringing precision to baking and cooking.  She also explains a lot about nutrition in this book (I love that her recipes for buckwheat pancakes suggest adding corn because buckwheat makes you constipated).

As I started paging through the book, I was inspired by a “lightening cake” recipe that seemed to have a better balance of flour and other ingredients than many other recipes.  I used that recipe as a starting point for this one.

When I brought the test batches into my office or shared with friends, even the non-gluten-free people wanted a copy of this recipe.  For them, I would say, if you are going to use regular, gluten flour, omit the guar gum and use 3 cups of regular flour instead of the almond, millet, tapioca and rice flours I use below.

If you don’t like the all spice I used in the glaze, it is easily substituted for cinnamon.

Slice the apples to about 1/4 inch thick, they don’t have to be uniform by any means, but they should be thin slices that will layer well on top of the cake.

For the Cake:

3 eggs

1 1/2 cups sugar

1 cup almond flour

1/2 cup millet

1/2 cup sweet rice flour

1/2 cup tapioca starch

1 t salt

2 t guar gum

3 t baking powder

1/2 cup (1 stick) butter, at room temperature, just leave the butter on the counter overnight

3/4 cup milk

2 t vanilla extract

1 t lemon extract

1/2 cup brown sugar (optional, I recommend using the brown sugar if you don’t want to use the glaze)

3-4 medium apples

Icing the cake.

For the Glaze:  

4 oz of cream cheese

1 t lemon extract

1/4 t all spice

1 cup powdered sugar

1. Preheat oven to 350ºF.  Lightly oil a 9×9 inch square pan and line with parchment paper.  Let the parchment paper hang over the edges of the pan so you can easily lift the baked cake out of the pan.

2. Using a stand mixer on medium speed, beat the eggs.  Slowly stream in the sugar.

3.  Whisk together in a separate bowl: almond flour, millet, sweet rice flour, tapioca starch, salt, guar gum and baking powder.  Slowly add the dry ingredients to the mixer (reduce the speed so your flour doesn’t go flying all over the kitchen).

The finished batter. Notice how the batter isn’t streaming off the beater.

4. Add in the butter, milk and extracts.  Whisk on high speed two minutes more until the mixture has pulled together. The batter should not be too runny. If the batter thickens before the two minutes are up, don’t stop!  The mixer is aerating the batter, which makes a huge difference between a brick and a light fluffy cake.

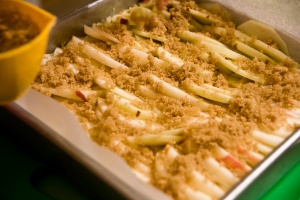
I have layered the apples on top, you can make fun patterns with the apples, I just worked in rows and sprinkled with the brown sugar (optional).

5. Peel and thinly slice 3-4 medium apples.  Layer on top of cake.  Top with 1/2 cup brown sugar.

6. Bake for 60-70 minutes or until toothpick comes out clean.

7. After the cake cools completely, lift it out of the pan using the parchment paper.

8. Whisk together the glaze ingredients and spread over cake.

The finished product. It’s sweet, chewy and covered with a glaze that reminds me of something you would find on a cinnamon roll. I hope you like it!

Meat Free Monday: Paul McCartney is making his own cookbook?

I know, I know, it’s not a Monday, but today I am going to pay a little homage to Paul McCartney’s latest endeavor, convincing people to go meatless one day a week.  He and his daughters are creating a cookbook celebrating the vegetable.  I love it, it is a simple suggestion to focus on the glory of the vegetable at least once a week.  It’s a great coincidence that the post I was writing over the weekend is inspired by one of Stella McCartney’s favorite London restaurants, Ottolenghi.

Accredited online colleges offer culinary classes for those of you who also dream of making your own cookbook.

I have been reading Yottam Ottolenghi’s Plenty with a veracity I normally reserve for mystery novels.  It’s a really inspiring book: the pictures are beautiful and the recipes are unique.  I also love that it is completely vegetarian.   But have no fear, if you are a devoted meat eater, you will be pleased to find that many recipes have such great flavors that meat won’t be missed at all.  Hey Paul McCartney, does this sound familiar?

While the book has been available in the U.K. for ages, it was only translated to American earlier this year.  This book is now on the shelves here in the U.S., using our silly customary units.  I have seen it featured in several bookstores and places like Anthropologie.

In addition to being entirely vegetarian, the book also eschews some other cookbook traditions, such as the standard courses set up (i.e. soup or pastry sections).  Instead, the recipes are divided into categories by the central ingredient: tomatoes, pulses (beans), roots, onions, etc.

Ottolenghi has so inspired my cooking that I am going to try to convince Husband to make sure our next trip to the U.K. coincides with one of their few cooking classes.

Plenty’s recipes are easily changed a little here or there and still produce fabulous results.  I found one of my favorite recipes, a quinoa and broad bean salad reproduced on thebroadbean.com, a cute blog on the wonders of urban gardening.  They made a few changes themselves, mostly adapting from U.K. (metric) to U.S. (silly) measurements.  This is my version of the same recipe, adapted for those of us without access to a garden and unusual varieties of vegetables.

Just a side note, this is also the best way to cook quinoa.  Comes out perfect every time.

Slicing radishes is super painstaking if you don't have a mandolin slicer, but the result is so worth it!

Adapted from Ottolenghi’s Plenty, using both the more sensible metric units and standard US measurements:

200 g | 1 heaping cup quinoa

500 g | a little over ½ pound shelled edamame (I buy the pre-shelled frozen stuff at Trader Joe’s)

2 medium lemons

2 garlic cloves, crushed

100 g | scant 1 cup radishes, thinly sliced (comes out to about half a small bunch)

25-50 g | a small handful (or two) basil, arugula or parsley also work well here, you just want something that is bold and flavorful (the recipe calls for more, say a large handful, but Husband prefers less, I suggest starting with a small handful and tasting before adding more)

2 tsp ground cumin (Ottolenghi suggests more, but since I am not a huge cumin fan, I suggest starting with less and adding by the ¼ tsp)

75mL | 1/3 cup extra virgin olive oil

¼ tsp chili flakes

salt and pepper, to taste

2 ripe avocados

1. Bring a large sauce pan of water to boil.  Add the quinoa and reduce the heat to a heavy simmer.  Cook 9 minutes.  Drain using a sieve (not a colander).

2. Allow the frozen edamame to come to room temperature.  I stick the beans in a colander and rinse with cold water.  They defrost quickly.

3. Cut the rind off the lemons.  Over a large bowl, using a paring knife, cut between the pith to release the lemon segments.  Squeeze the cut segments with your fingers to break up the segments.

4. Pile up the basil leaves and then roll them into a cigar-like shape.  Cut into thin segments.

5. Add the quinoa, edamame, cumin, chili flakes and olive oil to the bowl with the lemon juice.  Toss together.  Season with salt and pepper.  Add the basil leaves and toss some more.  Taste and see if you need more basil.

6. If you are using the whole salad in one sitting, chop both avocados into small pieces and add them to the rest of the ingredient.  Toss and serve.  If you are not serving the whole salad at once, I recommend slicing one avocado and use as a garnish on top of the salad.   Save the other one for lunch the next day.

6-8 servings, stays well in the fridge for about 3-5 days.

Lemon Macaroons

Since meeting the excellent folks from White Lion Baking Company, I have been experimenting more with almond flour.  This flour is high in protein and has a low glycemic index.  It’s a great way to add some protein into your diet.  I also like that almond flour produces a beautiful, light batter with no weird aftertaste.

The first thing I think of when I think of almond flour is French macaroons.  I had my first French macaroon in London.   The firm I worked at occasionally ordered macaroons from Paul Patisserie for afternoon meetings.  Since I worked nights, I got to sample a lot of left over pastries.  Every time I found macaroons in the kitchen, I housed those things.  I loved the delicate crunch of the cookie and the flavors; just hints of pistachio or chocolate or vanilla.

When I finally made my way to Paris, I was enchanted by their presentation: rows of drool-worthy rainbows of cookies lining the windows of just about every patisserie.

However, making macaroons has been a less enchanting experience.  The list of ingredients is short, but the list of things that can go wrong is pretty much endless.  I have been a little afraid of making my own since my first two attempts came out mediocre: they were either dry or overly toothsome without the pretty little “feet” typical of the ones made by the pros.

Two things were critical in overcoming these barriers: the first is this helpful article by Helen Dujardin aptly entitled Demystifying Macaroons, and the second was reading Elena Amsterdam’s the Gluten-Free Almond Flour Cookbook and learning about the importance of the brands of almond flour.  I had been using Bob’s Red Mill Almond Meal Flour, readily available at my local Whole Foods, but this coarser grind almond flour does is a bit heavy for a delicate recipe like this.  I bought Honeyville Farm’s almond flour online (recommended by Amsterdam) and have been pleased with the results.

Be sure to keep almond flour in the fridge to avoid spoilage, especially on those odd days it is actually warm and humid this summer.  Nut flours are prone to molding.

Despite the expert opinions I had read, my first batch of egg whites fell flat and didn’t whip into stiff peaks.  I got to soft peaks, but after 20 minutes with the mixer I had to admit defeat and tossed the marshmallow-y mix into ramekins and baked at 325 for 20 minutes.  They made nice little angel food-like cakes, which I served with fresh fruit for dessert.

The second time around, I managed to get the stiff peaks I was looking for.  I can’t really account for how or why I was able to get it right the second time around, but I do know that it is worth trying again rather than moving forward with so-so egg meringues.

Macaroons:

4 extra large egg whites

dash of salt

If you like to be precise in your measuring, try these dash, pinch and smidge measuring spoons, available on Amazon

¼ tsp cream of tartar

zest of one lemon

4-5 drops yellow food coloring

½ cup extra fine sugar

1 ½ cups almond flour

1 ½ cups confectioner’s sugar

Filling:

2 tsp lemon curd

½ cup mascarpone cheese

2 T Greek yogurt

2 T confectioner’s sugar

Makes about 28-32 macaroons, depending on how large you pipe out the rounds

1. Separate the eggs while cold.  Allow the whites to sit out on the counter and come to room temperature, about 30 minutes.  Instead of tossing the yolks, try reserving them for fresh lemon curd.  Line 4 baking sheets with parchment paper.

2. Pulse the almond flour and confectioner’s sugar together until well blended, about 15-30 seconds. I neglected to sift my flour mix.  That was a mistake, so make sure you sift this mix!  My batter came out a bit lumpy.

Be sure to stream in your sugar slowly. I put in about a teaspoon at a time and count to ten before adding more.


3. When the egg whites are at room temperature, put them in a mixing bowl and starting on low speed, start to beat the egg whites.  Add the dash of salt and the cream of tartar.  After about 30 seconds, move the mixer speed to medium, mix for another minute or two, until the egg whites start to turn white and foamy. Turn the mixer speed up to high.

4. When the eggs look like melted marshmallows, starting add the superfine sugar, very slowly.  I try to add about a teaspoon at a time, allowing each addition a few seconds to become incorporated.  The meringue should whip into stiff peaks.  This video is a fantastic guide to making meringue.

5. Add the lemon zest and the food coloring.  Mix until incorporated.

6. Folding in by hand with a spatula, gently fold in the almond flour mixture in thirds.  Try not to over mix; sifting the flour will make this easier.

It's easier to pipe these out if you make them like drawing spirals or coils.

7. Using a pastry bag, pipe little circles (about 1-1 ½ inches in diameter) onto the lined baking sheets.  I start by piping in a circle from the center.  The macaroons will look a little flat.  That is normal.

8. Tap the baking sheets on the counter firmly.  Go ahead: give them a good whack.  It releases air bubbles and helps the cookies to rise.

9. Preheat the oven to 325°F / 160°C.  Allow the cookies to stand on the counter 30 minutes.

10. Bake for 10-15 minutes.  The macaroons should puff up and have those little “feet” that Dujardin writes about.  They should just start to brown a little around the bottom edges.

11. Allow to stand for about 10 minutes.  Carefully remove from baking sheets and transfer to a cooling rack.

Make sure you allow the cookies to cool completely before you fill them. Since they are so small, this is pretty easy.

12.  Make the filling by combining all the ingredients and stirring together.  At least the filling is easy!

13. When the cookies are completely cool, spread a little of the filling on the cookies and sandwich together.  If you want a little extra lemon zing, spread a little additional lemon curd directly onto the cookies.

I suggest you store these in an airtight container separated by layers of wax paper.  They should keep in a cool place for 3-4 days.


These go well with DiSarano and coffee!

Review: Ottolenghi the Cookbook

So a Jew and a Palestinean start a restaurant…oddly, not the start of an inappropriate racial joke, it’s the story behind a popular restaurant in London.  Ottolenghi is one of my favorite restaurants in London and even as a poor graduate student, I would run up to the shop to treat myself to a meringue or tart.

Just looking in the window was drool-worthy: they had a knack for putting out salads, sandwiches and pastries in a way that was effortless, but beautiful.  Ottolenghi’s menu is really diverse and always changing.  They tend to focus on local, seasonal ingredients.  They head to the market and pick whatever looks best.

I was thrilled when I received this book for Christmas from some of our family.   The photos in this book are incredibly appetizing.  The book has a wide range of dishes.  There are a lot of great vegetarian recipes in here.  Vegetables aren’t relegated to side dish status; they are front and center.

While the baked goods section is not gluten-free, a lot of the recipes are naturally gluten-free, including: meringues, macaroons, chocolates and amarettis.  Many other recipes can easily be made gluten-free, since the flour is not always the bulk of the recipe.

The gluten cake is in the back and my g/f version is front and center. Note to those making this dish, double the frosting if you want to frost the sides!


Just check out these cakes: I made two versions, one gluten-free, one gluten-y.  Husband and my parents could barely tell the difference between them.  They said there was a very minor textural difference between the two cakes but no difference in taste.  This was probably because, unlike most cakes, flour is not the central ingredient.  Flour was only about ¼ of the total weight of the ingredients.

This is a fantastic cookbook.  I really look forward to trying every recipe in this book.

Cookbook Review: Gluten-Free Baking Classics

Gluten-Free Baking Classics by Annalise Roberts was the first gluten-free cookbook I purchased.  I use it as a jumping off point for many of my recipes.  It’s not the only gluten-free cookbook you will ever need, but it is a great starter.

Pros:

  • Overall, this book is easy to read, the recipes are clear and concise.
  • The recipes are well-researched and tested.
  • Roberts provides some rational for her ratios, which may allow you to make substitutions, as you get more familiar with g/f baking.
  • The recipes produce excellent baked goods: flavorful, moist and pretty light.
  • Roberts keeps the variety of flour mixes to a minimum.
  • Covers a solid range of classics from “rye” and challah bread to Oreo-style sandwich cookies.

Cons:

  • Some classics you would like to see are not covered.  No zucchini bread?  Gasp.
  • I was also miffed by the lack of advice on fruit pies. Roberts says to use different ratios of cornstarch for different fruits, but doesn’t provide clear guidance (i.e. – 2 Tbsp for berries and 3 for peaches.  Roberts simply notes that the amount of starch will vary depending on the fruit).  So now I use Joy of Cooking for the fillings and G/F Classics for the crust.
  • There is guidance on characteristics and brands, which is helpful, but some of it guides you to more expensive brands which don’t necessarily yield a better product.
  • Most of the recipes require you to combine oil and milk, mix them and then discard some, which requires an extra step and dirtying up a few extra utensils.  I am sure she tested this a million times, but given the other books on the subject, I am not sure there wasn’t an easier way to accomplish the same result.

There are only one or two naturally gluten-free recipes (i.e. – macaroons).   It’s not the kind of book that shows you ways to make things naturally gluten-free, but it does provide excellent guidance on replicating gluten-y baked goods.  I would definitely recommend this book to anyone who is looking for a solid guide to gluten-free baking.

Cookbooks: Babycakes

When I discovered Babycakes in NYC, I cheered!  I bought this book as soon as it came out.  I have a few vegan friends and like being able to bake for glutards and vegans in one fell, tasty swoop.

Pros:

  • The recipes produce tasty baked goods with a pleasing texture.  Pretty amazing feat considering the lack of gluten, refined sugars and animal products.
  • This book really focuses on healthful eating.  Babycakes uses a lot of coconut and bean flours to help us g/f bakers get some much needed fiber.  Combine the fiber with the low-glycemic sweetner, agave nectar and you have a healthy, filling breakfast or snack.
  • I sometimes find that bean flour overwhelms the taste of the baked goods, but the combination of ingredients keeps this from happening.
  • Nothing comes out overly sweet.

Cons:

  • This book touts itself as being gluten-free, but frequently uses spelt flour, which does contain gluten and is not suitable for celiacs or other gluten allergies. Babycakes says that they have procedures to avoid cross-contamination between products with spelt and those that are truly gluten-free.  I don’t mind the inclusion of spelt, but I wish that Babycakes had also provided a truly gluten-free alternative/substitute.  In order to really take advantage of lots of the receipes, I have had to experiment a lot in order to find suitable replacements.  I buy gluten-free cookbooks to avoid this process.
  • Several ingredients frequently used in this book are relatively pricey.  The price of agave nectar has come down a lot recently, but a small jar of coconut oil is more expensive than anything else I have seen on the baking aisle.  I tried to buy this at the local Super 88, however, the coconut oil purchased there tasted literally like vomit.  I had to brush my teeth 3 times to get rid of the taste.  Lesson learned: don’t cheap on the coconut oil.  It’s not good.

This is certainly great inspiration, but given the amount of recipes containing gluten, it won’t be your go to reference guide.  I still love you, Babycakes and plan to visit you every time  I am able!